How to Tell if Your Trousers are Ill-Fitting and How to Fix Them

Making your own trousers can be incredibly rewarding, but it comes with challenges! One of the most common issues is ensuring a proper fit. Ill-fitting trousers can be uncomfortable and unflattering, but fortunately, there are clear signs and straightforward adjustments you can make to get your trousers absolutely perfect! (Especially if you start with a nice easy pattern, our top pick for first timers is Tilly and the Buttons ESTI CO-ORD.)
Usually, if a garment is too big you can take it in without too much trouble, but adding fabric back into a garment that is too small is much less straightforward. If you’re making a pattern for the first time, we’d certainly suggest making a mock-up first, or using very generous seam allowances so you’ve got a bit of extra wiggle room.
Here are some key ways to tell if your trousers are ill-fitting and what you can do to correct them.
1. Wrinkles and Pull Lines
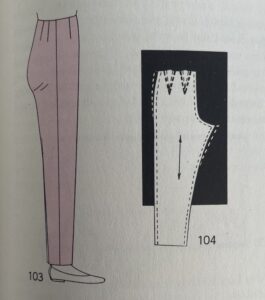
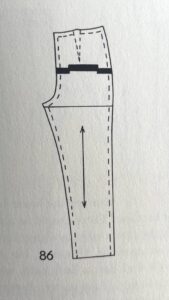
Symptoms: Wrinkles and pull lines often appear around the crotch, thighs, and hips. These can point to areas where the fabric is either too tight or too loose.
- Horizontal lines usually indicate tightness
- Diagonal wrinkles often signal excess fabric
Adjustment for Tightness:
- Identify the Problem Areas: Wear your trousers and note where the horizontal lines appear. Typically, these will be around the crotch and thigh area.
- Adjust the Pattern:
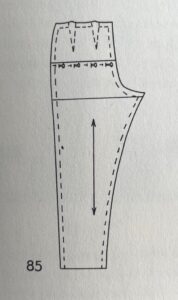
- Add Width to the Side Seams: If the trousers are too tight around the thighs, you can add width to the side seams. To do this, carefully unpick the side seams and re-sew them with a smaller seam allowance.
-
- Increase Crotch Depth: If the tightness is around the crotch, you may need to increase the crotch depth. This involves adding more fabric to the crotch curve. Unpick the crotch seam and re-sew it, decreasing the seam allowance to add more room.
- Try On and Repeat if Necessary: After making these adjustments, try on the trousers again. If they are still too tight, you might need to make further adjustments or consider cutting a new piece with additional width.
Adjustment for Looseness:
- Identify the Excess Fabric: Note where the diagonal wrinkles appear. These are usually around the hips and thighs.
- Pin and Mark: While wearing the trousers, pinch the excess fabric and pin it. Mark these areas with tailor’s chalk.
- Take In the Side Seams: Sew along the marked lines, taking in the excess fabric. Ensure that the new seam blends smoothly into the existing seam line to avoid creating new wrinkles.
- Adjust the Crotch Depth: If there is excess fabric around the crotch, sew a larger seam allowance along the crotch curve. This will reduce the excess fabric and improve the fit.
If you’re keen to learn how to make these adjustments and more, why not join our “Sewing with Emma – Eve Trousers – Trouser fitting” workshop? Our experienced tutor, Emma Smith, will guide you through taking accurate measurements, making a muslin, and evaluating and adjusting fit. The workshop includes a copy of the Eve Trousers pattern by Merchant and Mills, perfect for learning these essential fitting skills.
2. Waistband Gaping or Pinching
Symptoms: A waistband that gaps at the back or pinches uncomfortably at the front or sides is a clear sign of a poor fit. Gaping often occurs when the waistband is too loose, while pinching indicates it’s too tight.
Adjustment for Gaping:
- Identify the Gape: Wear the trousers and note where the waistband gaps. This is usually at the back.
- Add Darts or Take in Side Seams:
- Darts: If the gaping is minor, or the waistband doesn’t quite follow the curve of your back, add darts to the back waistband. Pinch the excess fabric and sew darts from the waistband downwards.
- Side Seams: For significant gaping, unpick the side seams and re-sew them, taking in the excess fabric.
- Adjust the Centre Back Seam: For major adjustments, remove the waistband, take in the centre back seam, and reattach the waistband.
- Elastic Insert: If you’ve only got a tiny gape, and prefer a more flexible solution, insert elastic into the back waistband. This will pull the fabric snugly against your waist.
Adjustment for Pinching:
- Identify the Pinching Points: Wear the trousers and mark where the waistband pinches. This is usually at the front or sides.
- Let Out Side Seams: If there is enough seam allowance, unpick the side seams and re-sew them with a smaller seam allowance to provide more room.
- Create a New Waistband: If the pinching is severe and there isn’t enough seam allowance to let out, you might need to create a new waistband. Measure your waist accurately and add a little extra for ease. Cut a new waistband piece and attach it to the trousers, ensuring a comfortable fit.
- Consider a Contoured Waistband: A contoured waistband, which curves slightly to match the shape of your waist, can provide a better fit than a straight waistband. Adjust your pattern to include a contoured waistband if pinching is a recurring issue.
Finally, give the garment a good press! It’s impossible to know if the fabric is falling nicely if it is crinkled and warped from the sewing. You’d be amazed what a difference pressing can make.
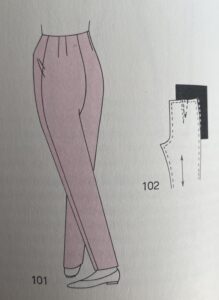
If you’re looking to create your first pair of well-fitted trousers, either the Eve Trouser Pattern or Tilly and the Buttons Thea is the one to go for. Eve is cropped, with a slightly tapered leg and optional turn-ups, fitting neatly at the waist and over the hips with a simple side zip and two back pockets. Thea is a vintage inspired wide-leg, with a high waist and multiple pocket options to suit all tastes.
For a looser fit with generous pockets, the Harvester Pants are another great option.
Sew With Confidence!
Making adjustments to your trousers can be daunting, but with careful observation and some patience, you can achieve a perfect fit. Remember, we always suggest testing your fit with a muslin or mock-up before cutting into your final fabric. This way, you can make necessary tweaks without the risk of ruining your precious material. Happy sewing!
For hands-on help, don’t miss the “Sewing with Emma – Eve Trousers – Trouser fitting” workshop. Book yourself a day of learning how to make trousers that fit beautifully, with expert guidance from Emma Smith. Bring your sewing machine, basic sewing kit, fabric, and lunch to nibble, and we will keep you going with tea and cake!