DIY Reusable Sanitary Pads: A Beginner’s Guide

In recent years, there has been a growing awareness of the environmental impact of disposable menstrual products. And that’s before we get into the cost implications, buying sanitary products gets very expensive very quickly! Many people are seeking alternatives, and reusable sanitary pads are an excellent choice. They’re not only more sustainable but also cost-effective in the long run.
You might be pleasantly surprised to learn, sewing your own period products is easier than you think. In fact, we’re very confident you can do it. In this blog, we’ll guide you through the process of creating your own reusable menstrual pads, tailored for beginners.
What is the best fabric for reusable sanitary pads?
Choosing the right fabric is crucial when making reusable sanitary pads. You’ll want something that is soft, absorbent, and easy to wash. Cotton is a popular choice due to its breathability and absorbency. Flannel and bamboo are also excellent options. For added comfort, some people like to add a layer of PUL (Polyurethane Laminate) to make the pad leak-proof. It’s important to select materials that are easy to work with, especially if you’re new to sewing. Choose something not too bulky, not too slippy.
Can you make your own reusable pads?
Yes, you absolutely can make your own reusable sanitary pads, and it’s easier than you might think. Even if you’re a complete beginner, with a little guidance and some basic sewing skills, you can create your very own set of eco-friendly menstrual pads. We’ve got all the supplies you might need if you want to have a go at home, or come and join us in the studio at our workshop!
How do you make reusable menstrual pads at home?
Here’s a step-by-step guide on how to make reusable menstrual pads at home:
Materials you’ll need:
- Fabric for the top layer (cotton, terry, or bamboo)
- Absorbent layers (more of the same fabric or specialised absorbent material)
- PUL fabric for the bottom layer (optional)
- Snaps for closure
- Sewing machine or needle and thread
- Scissors and pins
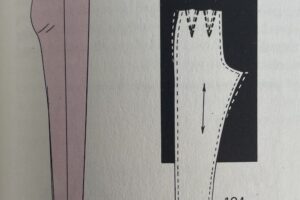
Step 1: Create the pad pattern
Start by creating a pattern for your reusable pad. You can find templates online or design your own based on your preferences. If you join our workshops, we’ll provide you with patterns.
Step 2: Cut the fabric
Use your pattern to cut the fabric into the desired shape and size. You’ll need two pieces of the top layer, one piece of the absorbent layer, and one piece of the PUL fabric if you’re making a waterproof layer.
Step 3: Layer and sew
Place the absorbent layer in the middle, between the two pieces of the top layer, and, if you’re using it, the PUL layer on the bottom. Pin the layers together and sew around the edges, leaving an opening to turn the pad right side out.
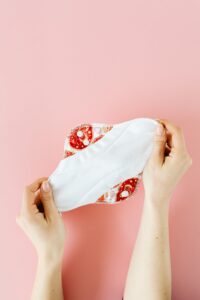
Step 4: Turn and finish
Turn the pad right side out through the opening, then sew the opening closed. You can add snaps for a secure closure.
How do you make reusable sanitary pads UK?
Voila! You’re the proud owner of a DIY reusable sanitary pad, something no menstruator should be without. Now go and make another. You’ll need at least one to wear, one in the wash, one drying.
With the right materials and some basic sewing skills, beginners can create comfortable, cost-effective, and environmentally friendly menstrual products. (It’s a great first project, we promise this is not a garment where you need to worry if anyone will judge your wonky seams!)
If you’re interested in learning more and getting hands-on experience, consider joining our upcoming DIY reusable sanitary pad class. We’ll guide you through the process step by step, and you’ll leave with a set of pads you can use with confidence. We can’t stress enough, this class is a safe space and open to all, however you identify, if you want to learn, we would love to teach you. Join us in making a positive impact on your menstrual health and the environment.

I am interested to join
I would definitely be interested in joining an online workshop or class for this. Knowledge is power.
I do love making reusable pads and I do want to fulfill my dream.kindly help please such that I gain more skills and build and Career.thank you so much