Finishing your quilt
So you have made a patchwork quilt – well done you! The next bit often makes me scratch my head and reach for one of my many quilting books so here I have some useful hints and tips to get your quilt bound to perfection. Don’t panic here is the low down on how to finish your patchwork quilt with help to bind the edges.
FINISHING THE QUILT
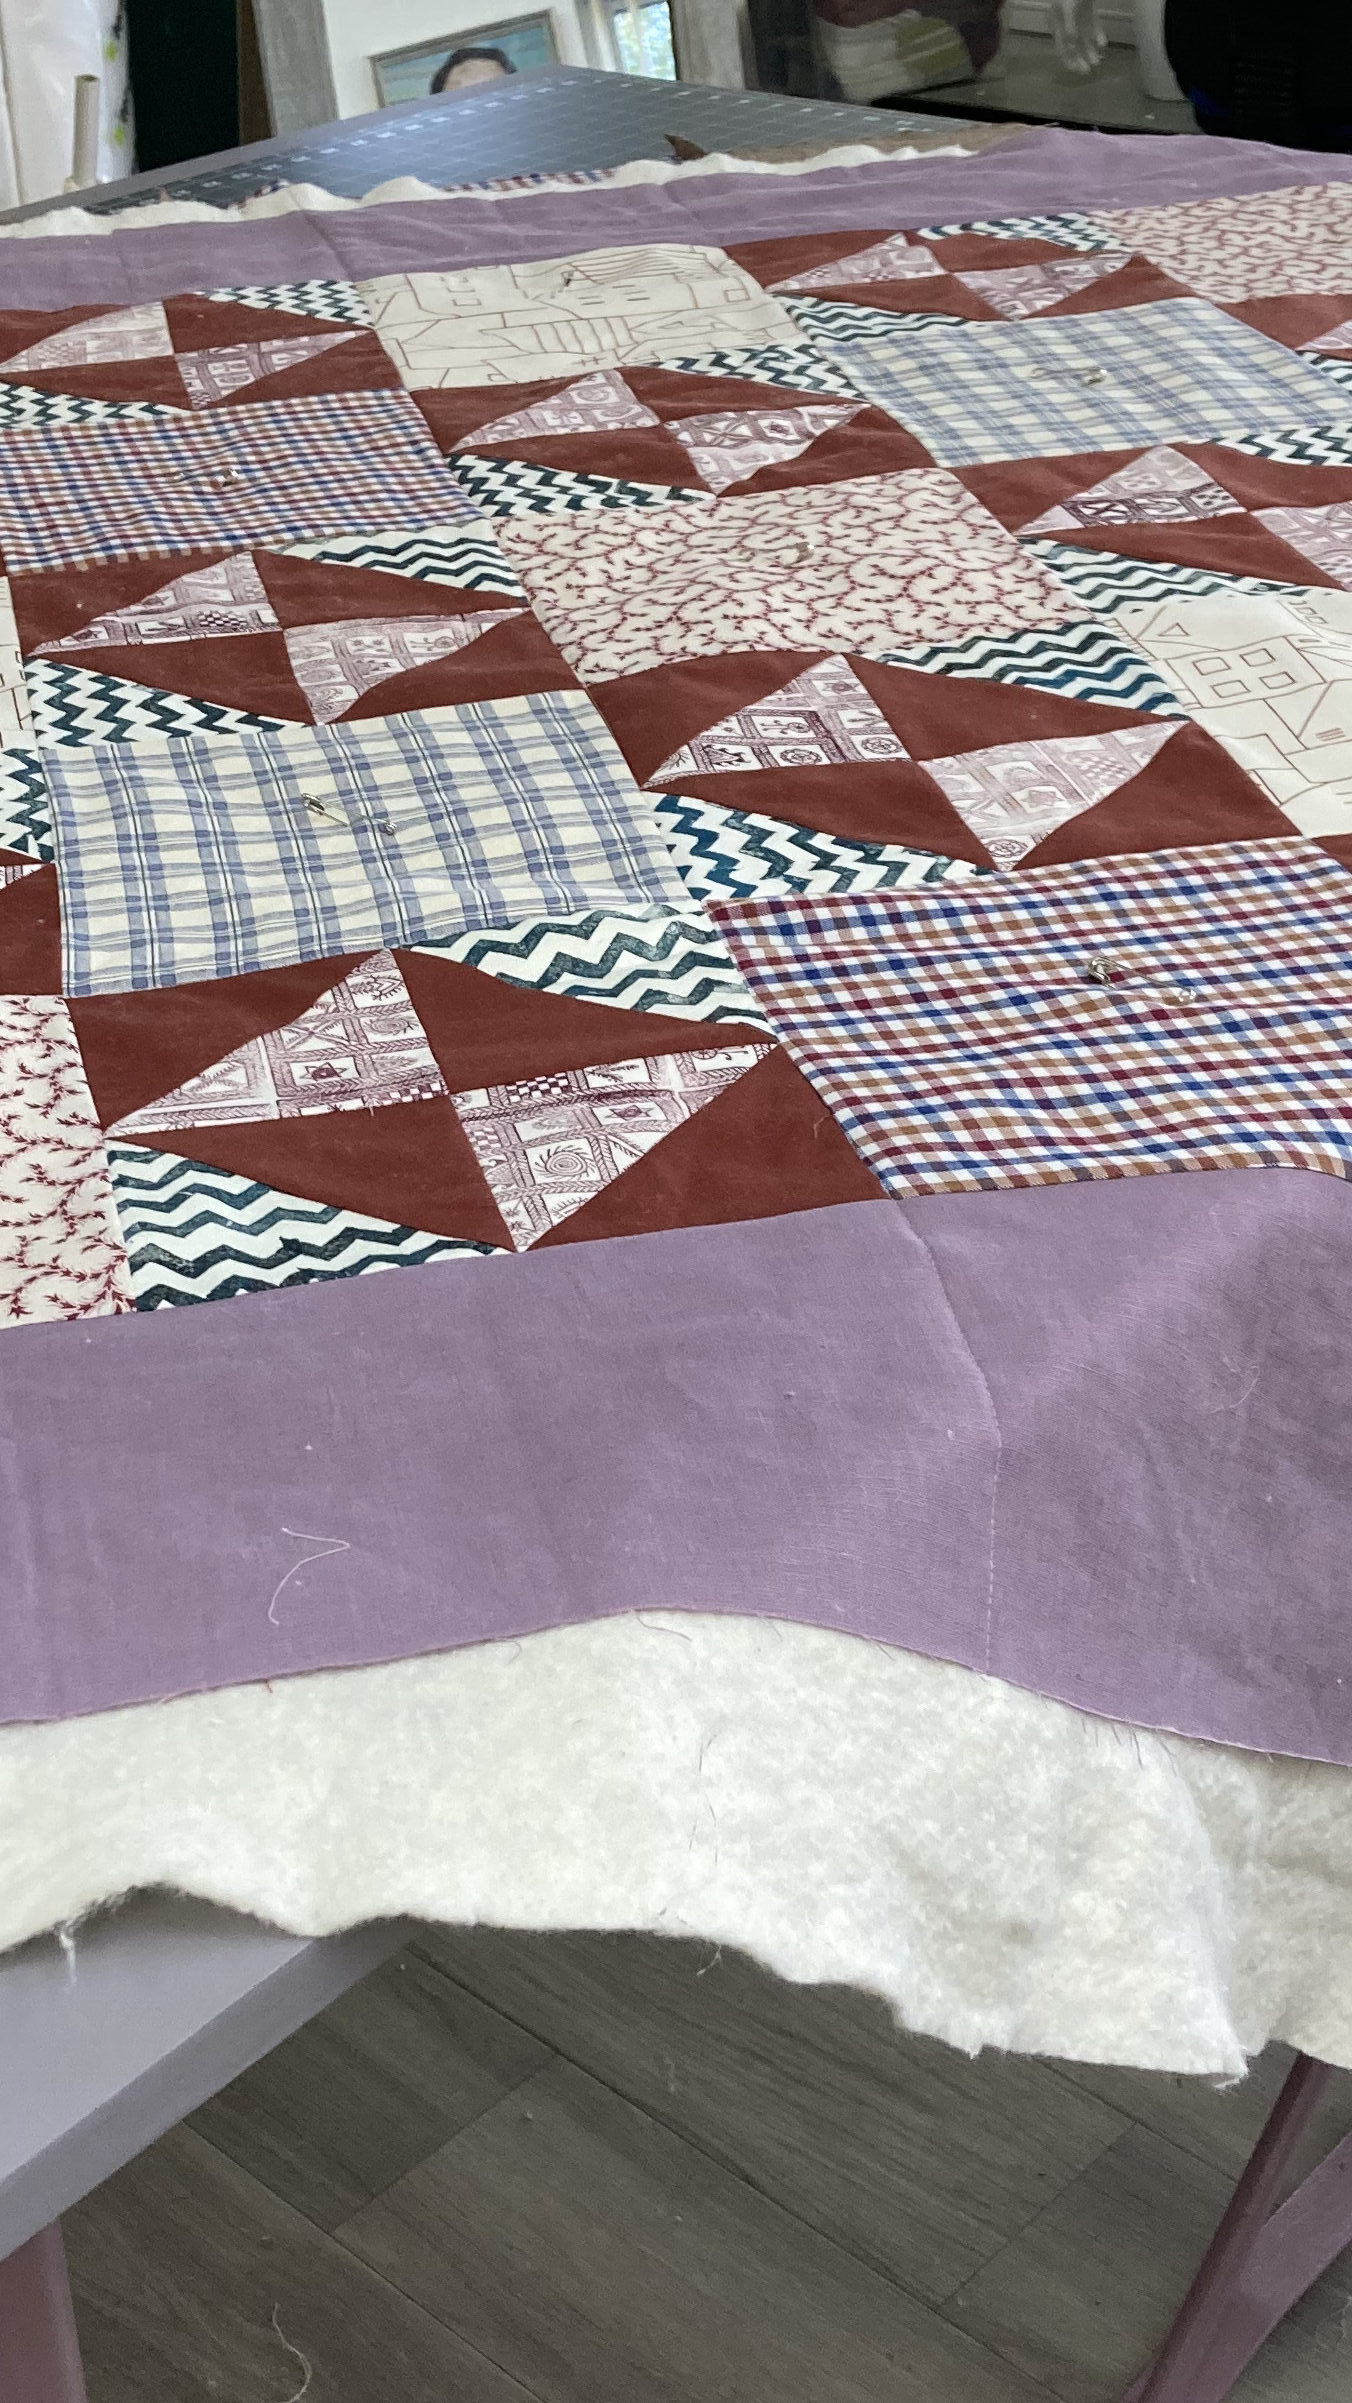
Cut a backing fabric to match quilt top – or slightly larger. Press your quilt top and backing fabric well. Sandwich with wadding between – spray baste and or pin to hold the layers together.
Selecting a longer machine stitch quilt by stitching in the ditch as much or as little as you wish. You may find a walking foot useful at this stage.
Trim the quilt to straighten all sides. If you need extra space to do this you can book time in the studio get in touch here
Prepare your binding
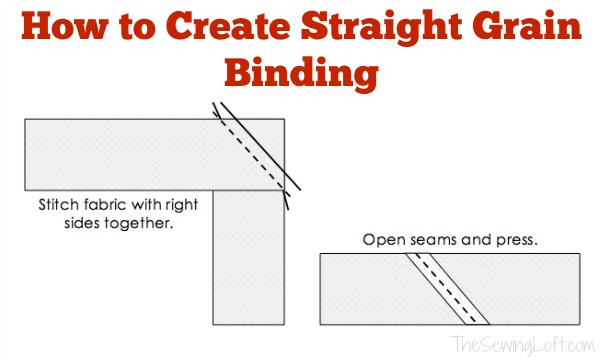
Cut your border fabric into 2.5 inch strips join on the 45 degree angle to reduce bulk where the strips join. See diagram below on how to do this.
You will need a strip which is as long as twice your quilt height and width with an extra 12″ to allow for corners and joining.
Press in half wrong side together and machine stitch onto the edge of the quilt lining up the raw edges.
Start approx 1/3 of edge length from a corner and leave a 6 inch tail of binding fabric. Stitch with a 1/4 seam allowance and stop 1/4 from the corner and back tack.
Fold the binding over and back so that when you turn it over the edge you have a good mitred corner – recommence stitching 1/4 from the corner on the next edge. Have a look at my demo below:
You can either fold a ‘hem’ on one edge of the binding and tuck the other end inside it – trimming the excess or join the two pieces at the right place to get a continuous binding strip.
Sew the binding where you have joined or overlapped them then press the binding towards the back of the quilt and clip or glue baste in place before stitching either in the ditch from the front to sew the back in place or by hand.
Your quilt is complete – please label it with your name and date for your reference and just incase it survives through the generations and really becomes an heirloom.
Any questions please do ask, phone, text, email or pop into the studio!
